How to Build a Custom Wooting 60HE+: An Initial D Themed Guide
It is said that the perfect machine is one where the user and the tool become one—a perfect extension of will. We apply this philosophy not to a car on a mountain pass, but to a keyboard on a desk. This build log is a meditation on the pursuit of mechanical perfection and the quiet, obsessive satisfaction of the builder.
This post serves as the complete, written record for our cinematic build film. Here you will find a full parts list, a guide to the assembly process as shown in the video, and the final sound test.
The Film: "Initial D: Stage Wooting"
The Build Sheet: Parts & Tools
The components, tools, and materials used in this meditation. Some of these are affiliate links, which help support the channel at no extra cost to you. Our conclusions are, as always, grimly objective.
Keyboard Core:
Module: Wooting 60HE+
Dampening: 5-Piece Custom Foam & Silicone Dampening Kit
Switches:
Aesthetics:
Keycaps: "Initial D" Themed PBT Keycap Set
Decals: "Fujiwara Tofu Shop" and other vinyl decals
Tools & Gear:
Camera: Osmo Pocket 3 Creator Combo
Studio Lights: Zhiyun G60
Desk Mat: RGB Desk Mat
Precision Screwdriver: Wowstick
The Assembly Guide: A Step-by-Step Contemplation
This guide reflects the methodical process shown in our film.
Step 1: The Unboxing Ritual
The process begins not with assembly, but with unboxing. As shown in the video from 00:49 to 07:10, each component is revealed with deliberate care. This is the moment to inspect each part, from the Alumaze60 case to the themed keycaps, and lay them out in an organized fashion on the desk. This act of preparation is a crucial part of the meditative process.
Step 2: The Assembly
This is the core of the film, a long and hypnotic sequence where the machine takes its form.
Switch Installation: As seen from
07:21onwards, the primary task is carefully pressing each of the Gateron Jade Max switches into the carbon fiber plate. This is a repetitive and satisfying process that forms the heart of the keyboard.Keycap Installation: Once the switches are seated, the keycaps are meticulously installed, bringing the Initial D theme to life.
Step 3: The Livery (The Final Touches)
With the main body assembled, the final aesthetic details are applied. This includes affixing the custom "Initial D" Wooting strap and placing the vinyl decals on the case to complete the homage.
The Sound Test
The machine is assembled. Now, we must hear its voice. The sound test, beginning at 27:09 in the film, reveals the final acoustic profile of the fully built and themed keyboard.
The Final Word: A Monument to an Ideal
And that is the beautiful absurdity of this hobby. We build the perfect tool, not because we are masters, but because the pursuit of perfection itself is the point. The object is a monument to an ideal we will never reach. And sometimes, that is enough.
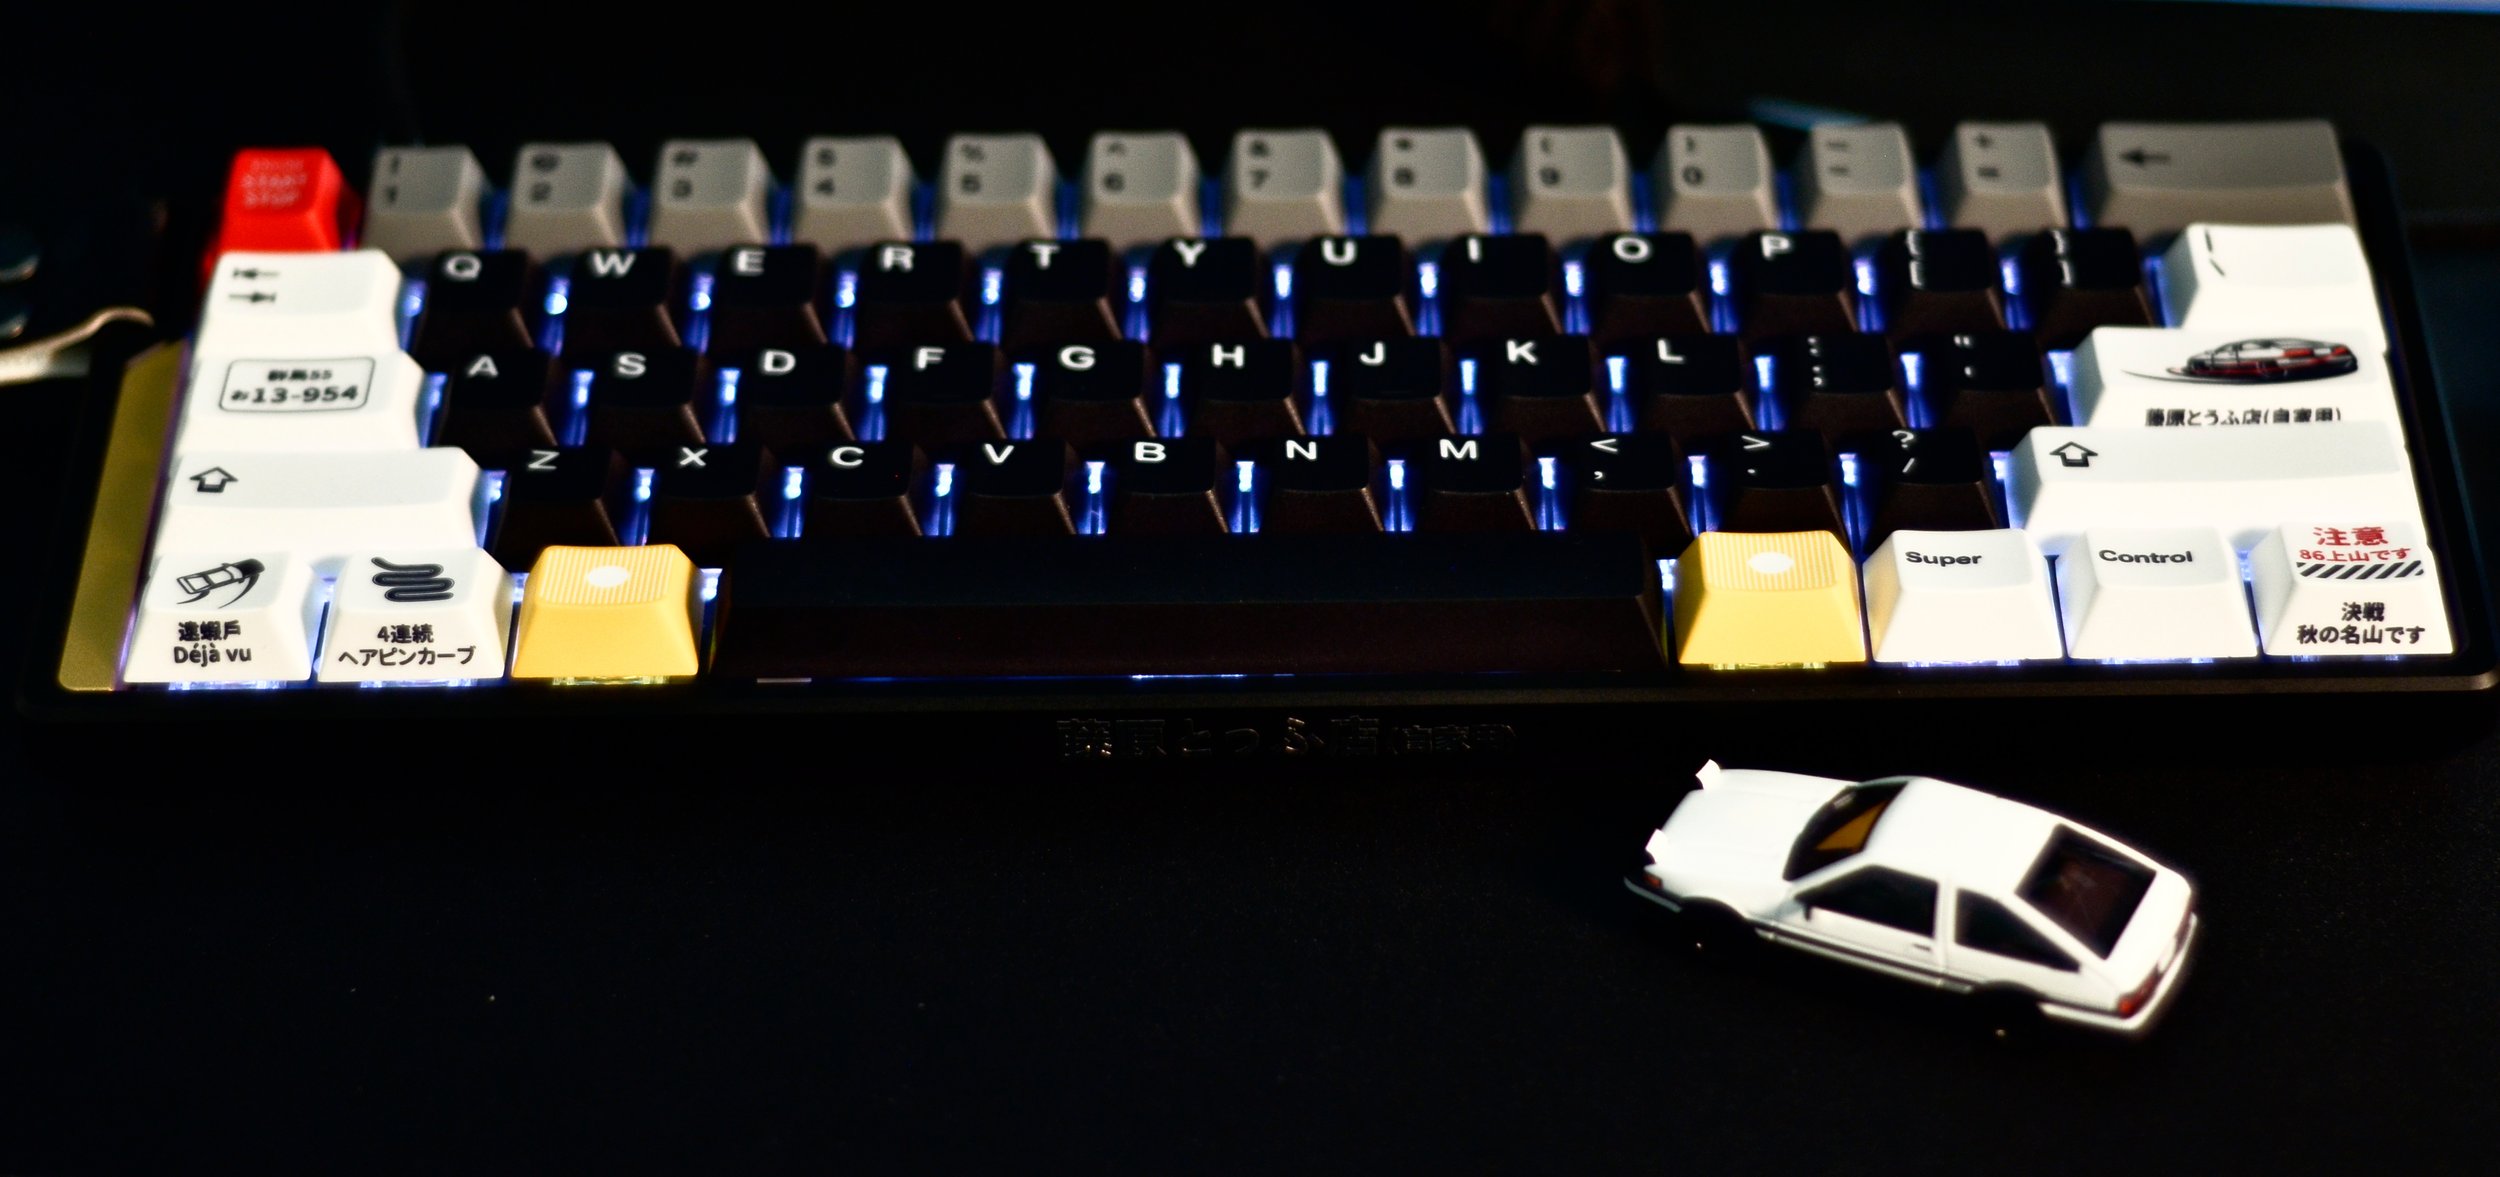
Initial D Themed Wooting 60HE+